Getting started
Set up your account, connect Telegram, and have a working CRM in a few minutes.
Create your workspace
Telebux is organized around workspaces. A workspace is a self-contained CRM with its own contacts, organizations, deals, pipelines, custom fields, team members, and billing. Most people start with one, but you can run several from a single login and switch between them instantly, which is how agencies and operators keep separate businesses from mixing.
To get started you'll need to choose your workspace type, fill in your details, and agree to the terms.
- 1 Choose a workspace type. The first thing you'll see is the Workspace type selector with two options – Individual and Business.
- Individual - single-seat workspace for personal use. Individual workspaces can be upgraded to Business later.
- Business - multi-seat workspace designed for teams. Note that Business workspaces cannot be downgraded to Individual once created.
- 2 Fill in your details. Once you've chosen a workspace type, fill in the sign up fields:
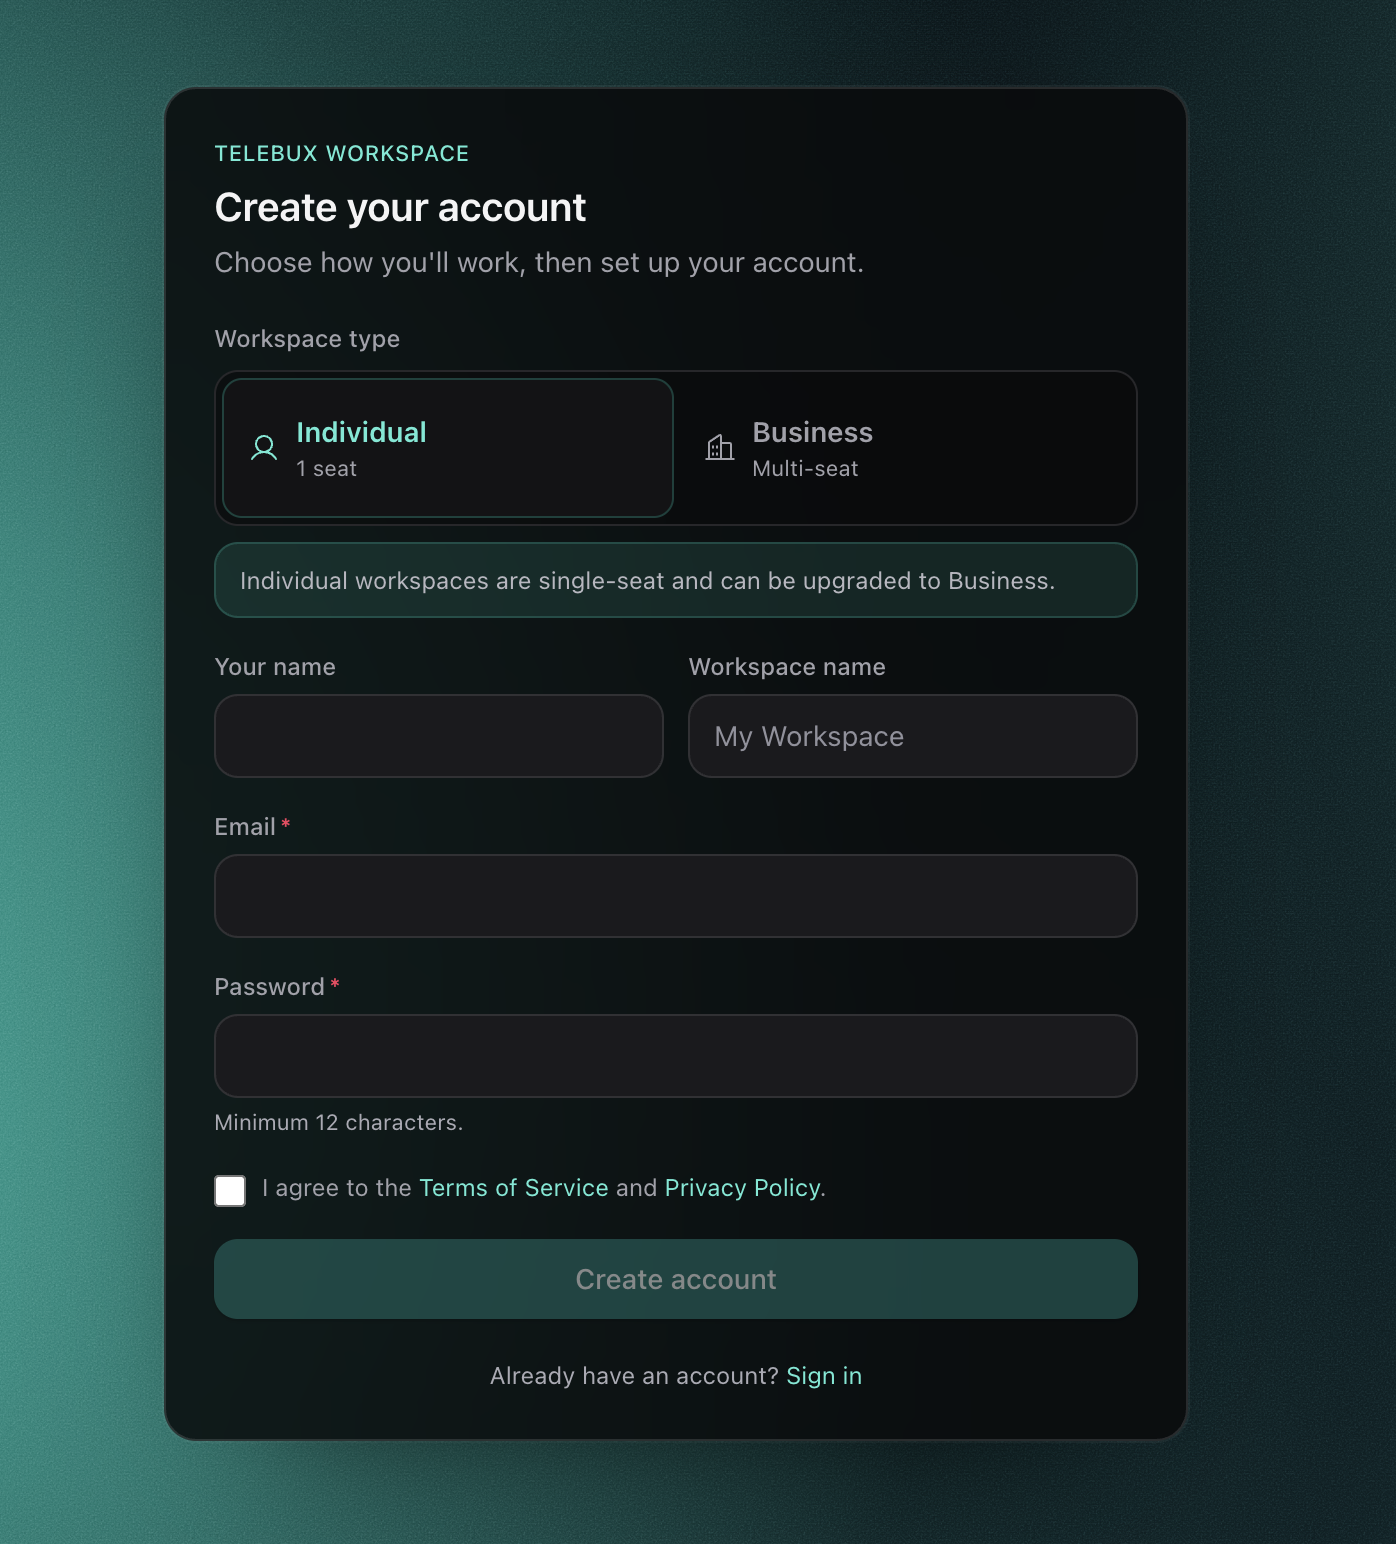
Sign up form - 3 Agree and create. Before you can create your account, check the box confirming that you agree to the Terms of Service and Privacy Policy. When everything is filled in, click Create account. You'll be taken into your new workspace.
Tip. Data never crosses between workspaces. Contacts, deals, and pipelines in one are invisible to the others, so you can keep clients or brands fully separate.
Choosing your workspace type: Individual or Business
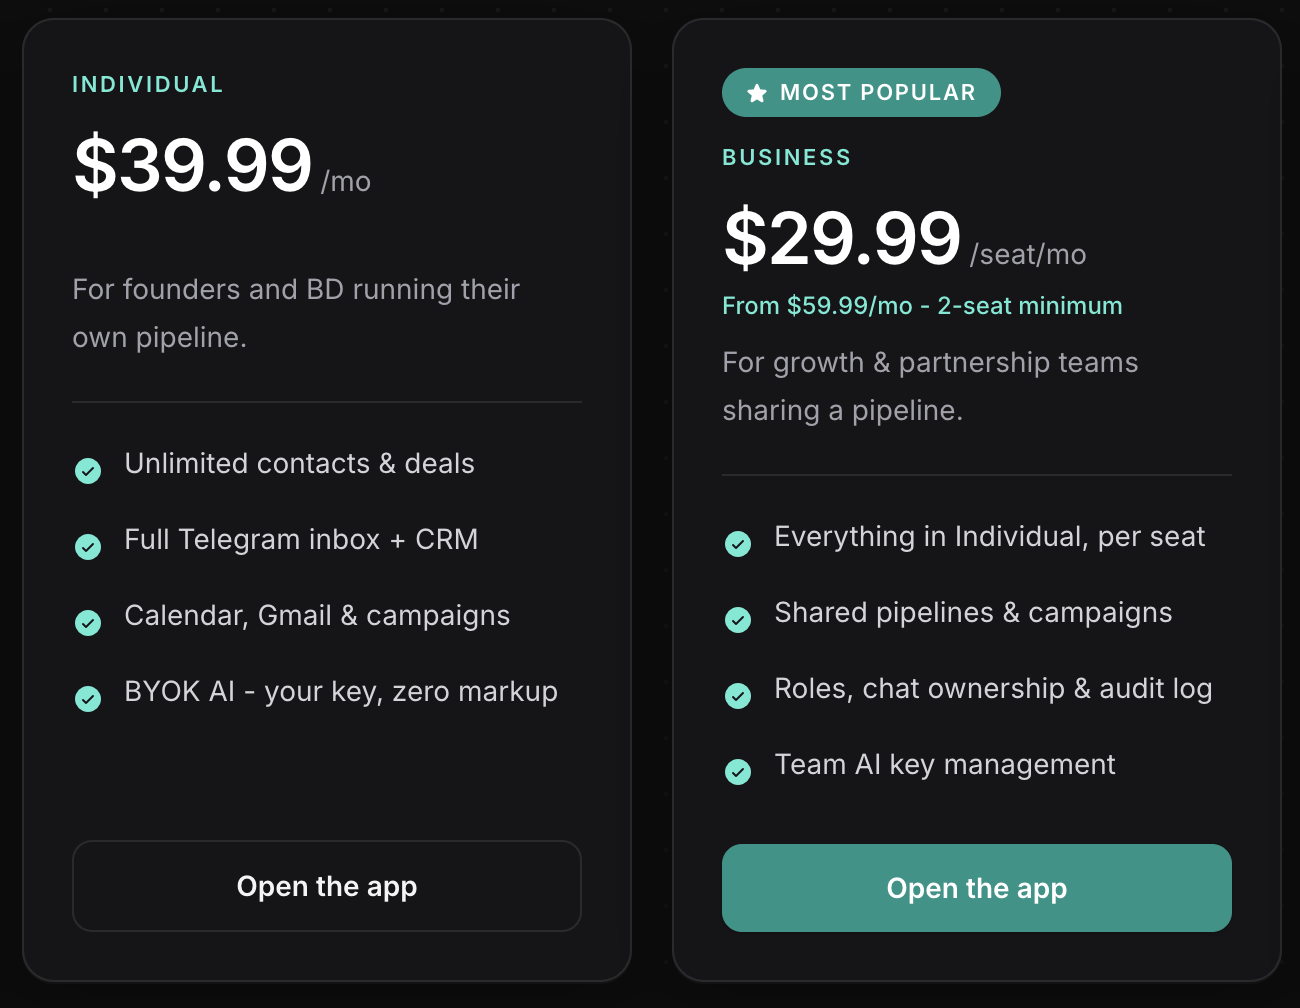
When you create a workspace you pick a type, Individual or Business. Both give you the complete Telebux product, the same Telegram sync, pipeline, calendar, mail, campaigns, integrations, and AI assistant. The only difference is whether you work alone or with a team, and how billing works.
Individual is $39.99 per month, flat. It is built for one person: you are the only member, and it covers everything Telebux does.
Business is $29.99 per seat per month with a two-seat minimum, so it starts at $59.99 per month for two seats and adds $29.99 for each additional seat. Your team shares the same CRM data, contacts, organizations, deals, and pipeline, while personal connections stay personal: each member links their own Telegram, Gmail, and Google Calendar.
You are not locked in. Start on Individual and upgrade to Business the moment you add your first teammate, without losing any of your contacts, deals, or history.
Connect your Telegram account
Telebux connects to your own Telegram account as a genuine client, the same way Telegram Desktop does. It is not a bot, and it does not message anyone on your behalf without you. Once connected, your conversations mirror into the CRM in real time, with full history, folders, files, and reactions.
Nothing moves off Telegram and nothing changes for the people you talk to. Your contacts keep chatting with you exactly as before.
- 1 Open the connect screen. Go to Settings > Telegram.
- 2 Scan the QR code. On your phone, open Telegram and go to Settings, then Devices, then Link Desktop Device, and scan the code shown in Telebux.
- 3 Wait for the first sync. Your chat list, message history, and folders load into the app.
Tip. The connection is a standard Telegram session. You can review it or revoke it any time from Telegram under Settings, then Devices, and access to Telebux stops immediately.
Connect Gmail and Google Calendar
Connecting Google brings your email and calendar into the same workspace as your deals. It is optional, and each team member connects their own Google account, so nobody sees anyone else's inbox.
Telebux requests Gmail and Calendar access only to show your mail, map messages to the right contacts, let you reply, and keep events in sync. It does not sell your data or use it to train AI.
- 1 Start the connection. In Settings > Integrations choose Connect Google.
- 2 Approve access. Grant Gmail and Calendar permissions on the Google consent screen.
- 3 Confirm the sync. Your inbox appears in the Mail view and your events appear in the Calendar, both syncing two ways.