Mail and campaigns
A Gmail inbox in the CRM, plus mass send and personalized campaigns over email and Telegram.
Your Gmail inbox in the CRM
With Gmail connected, you get a working inbox inside Telebux. Read, reply, and send email without opening another tab, and every message maps to a contact by email address, so the thread sits next to the deal it concerns.
Because mail and pipeline share the same workspace, the full history of a relationship, chat and email alike, lives in one place.
- 1 Open Mail. Go to the Mail view once Google is connected.
- 2 Read and reply. Work your inbox as usual. Replies send from your own Gmail address.
Create a Telegram campaign
Campaigns deliver one message to many chats at once, turning an hour of copy and paste into a single action. Use them for announcements, launches, or a note to a segment of your audience.
Select whole Telegram folders, hand-pick the chats you want, or paste a list of telegram handles, then send right away or schedule the batch for later.
- 1 Choose recipients. On the right side of the Compose screen, build your recipient list in any combination of three ways:
- Individual contacts - select people directly from your synced Telegram contacts list.
- Folders - select an entire Telegram folder to include everyone in it.
- CSV handles - paste handles line by line, or click Upload to import a CSV file. The @ prefix is optional.
- 2 Write the message. Give your campaign a descriptive Campaign name so you can find it later (e.g. "May investor follow-up"). Then compose your message in the text area below. The editor supports bold, italic, and links via the toolbar. Type / to browse message templates.
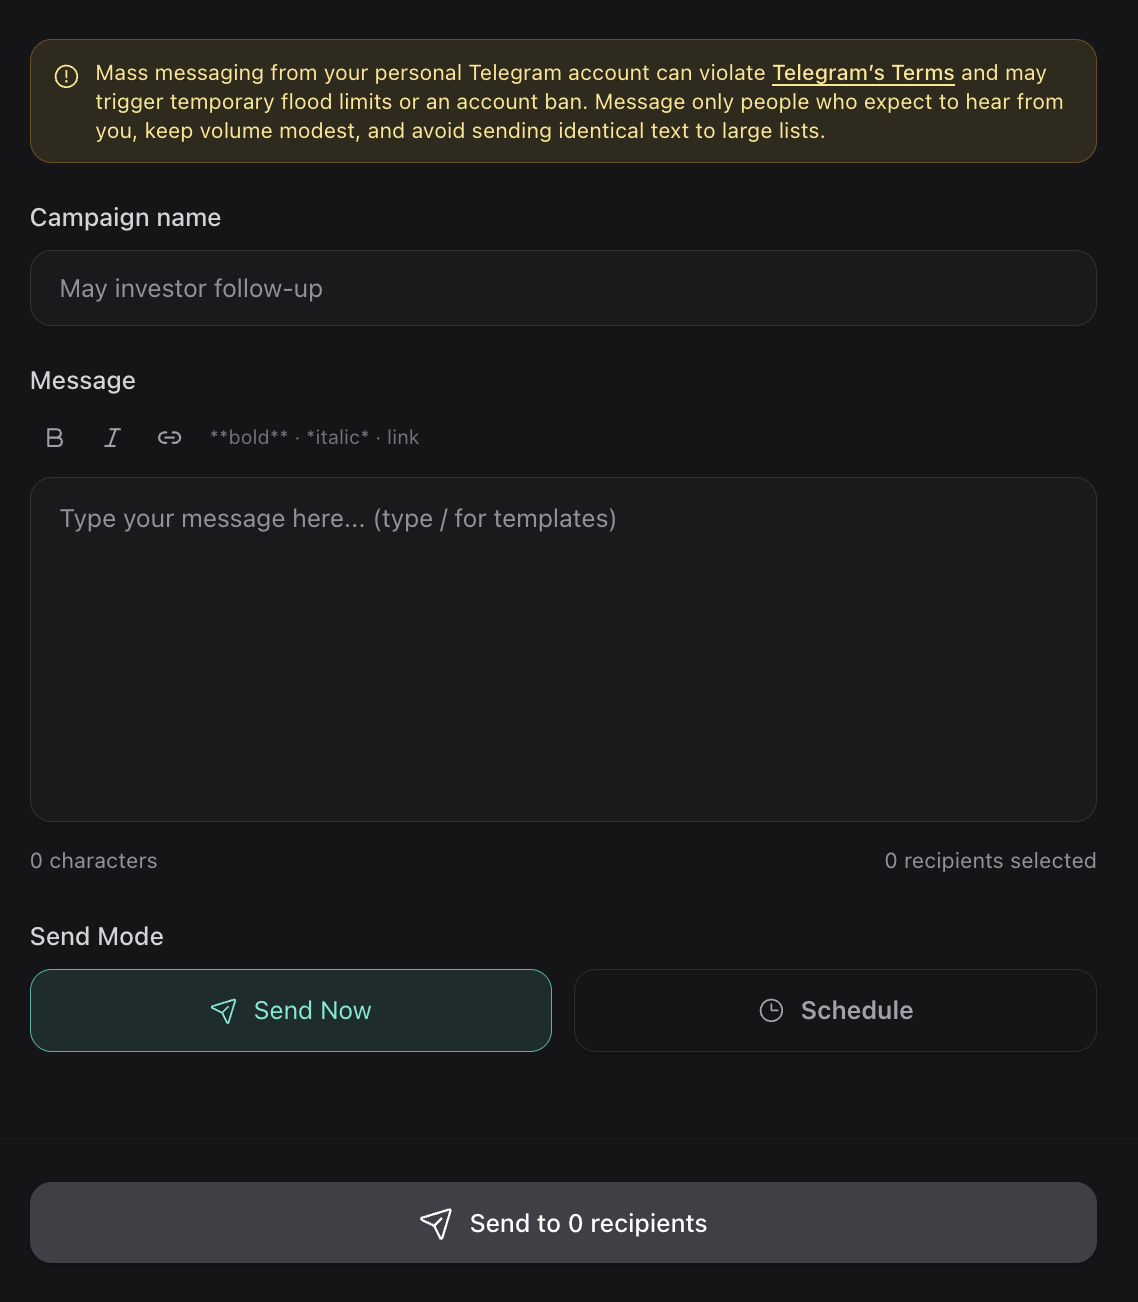
- 3 Send or schedule. Under Send Mode, choose how to deliver the campaign:
- Send Now - delivers the campaign immediately.
- Schedule - lets you pick a date and time for the batch to go out.
- 4 Review past campaigns. Switch to the Campaigns History tab to see every campaign sent from your workspace. Each entry shows the campaign name, send date, and delivery stats – total chats, successfully sent, and failed. Click a campaign to expand it and view the full message content, timeline, and a per-recipient delivery log.
Tip. Keep mass messages relevant to the group you send them to. A message that reads as personal lands far better than an obvious blast.
Create an Email campaign
Email campaigns let you send one message to multiple contacts at once. Emails are sent through your connected Gmail account, so recipients see your real address and can reply directly.
- 1 Choose recipients. At the top of the Compose screen, build your recipient list using any of the three tabs:
- Contacts - select people from your synced contact list. Use the search bar or Filters to narrow results, or check Select all to include everyone shown.
- Paste emails - type or paste email addresses directly.
- Upload CSV - import a CSV file with recipient email addresses.
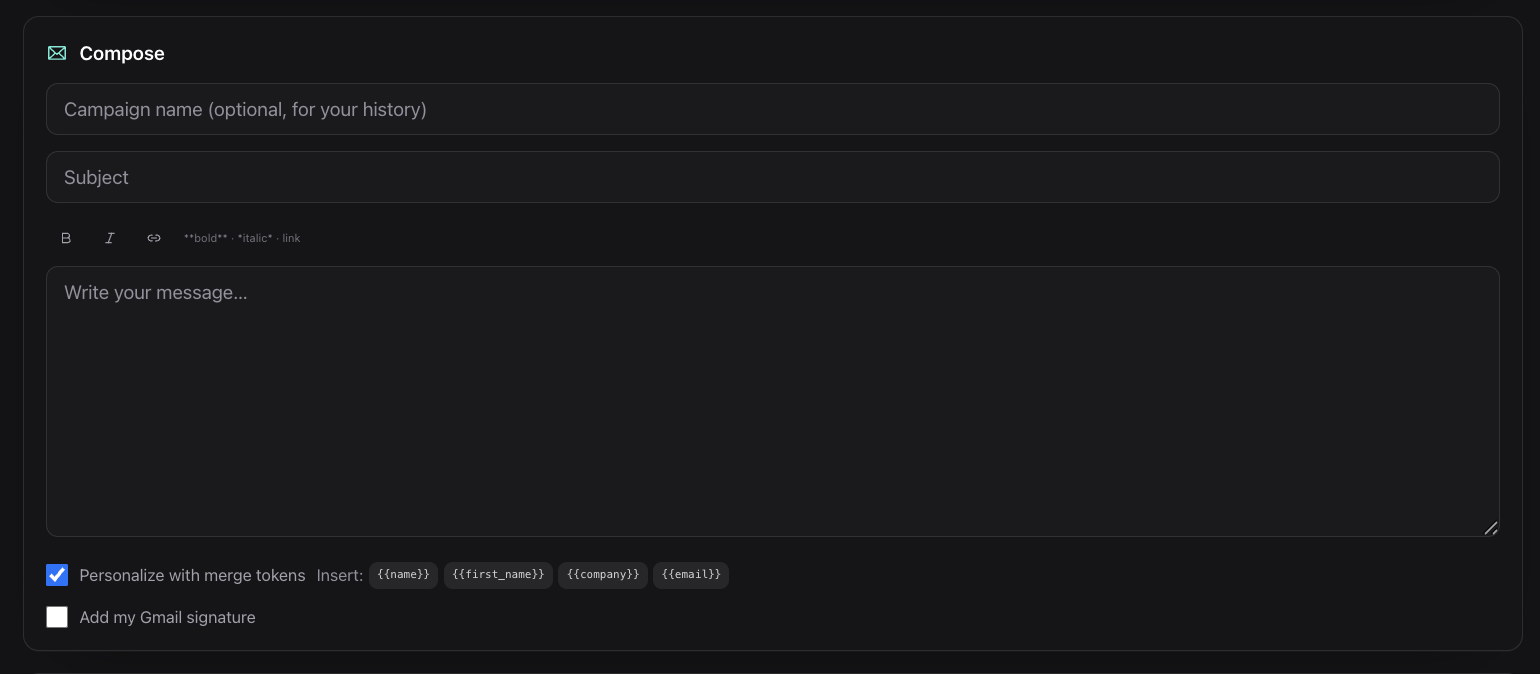
- 2 Write the message. In the Compose section below the recipient list, fill in the following:
- Campaign name - optional, but useful for finding the campaign in your history later.
- Subject - the email subject line your recipients will see.
- Message - compose your email in the text area. The editor supports bold, italic, and links via the toolbar.
- 3 Send or schedule. At the bottom of the page, choose how to deliver the campaign:
- Send now - delivers the campaign immediately.
- Schedule - lets you pick a date and time for the batch to go out.

- 4 Review past campaigns. Switch to the Campaigns History tab and select Email to see every email campaign sent from your workspace. Each entry shows the campaign name, status, send date, sender, and delivery stats – total recipients, successfully sent, and failed. Click a campaign to expand it and view the subject, message content, timeline, and a per-recipient delivery log.